
With Schaller Security Locks, we developed and patented a completely new product in 1981, probably the most secure connection between guitar and strap. In 2018, the next generation was introduced with the S-Locks.
S-Locks: S For Safe, Silent & Schaller Strap Locks
In the development of the new revolutionary S-Locks we have combined 3 parts to perfection:
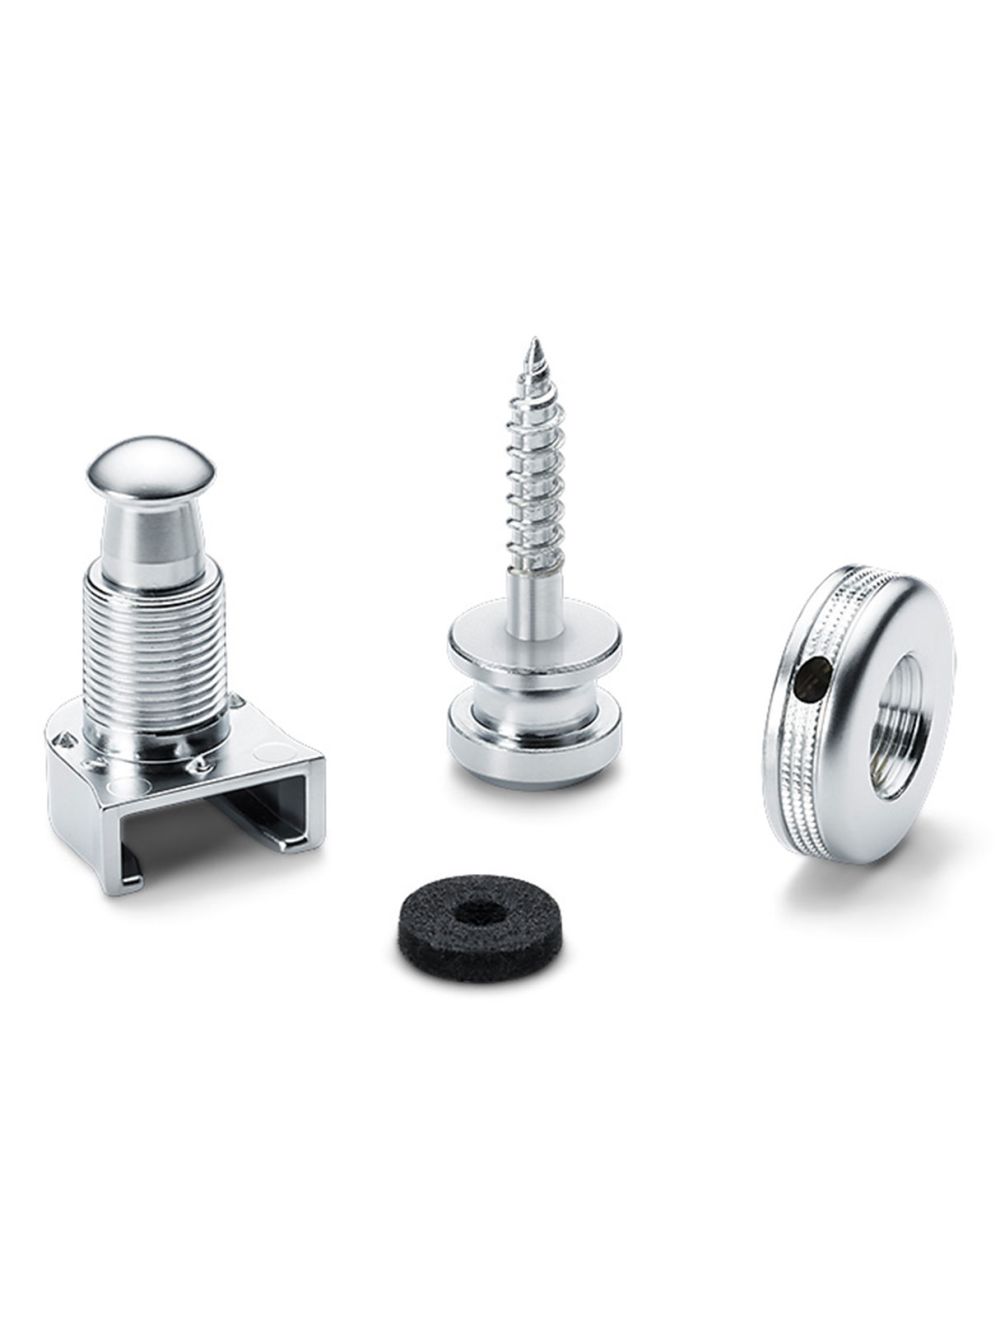
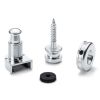
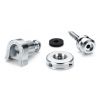
The S-Locks New Strap Button
The S-Locks Improved New Lock
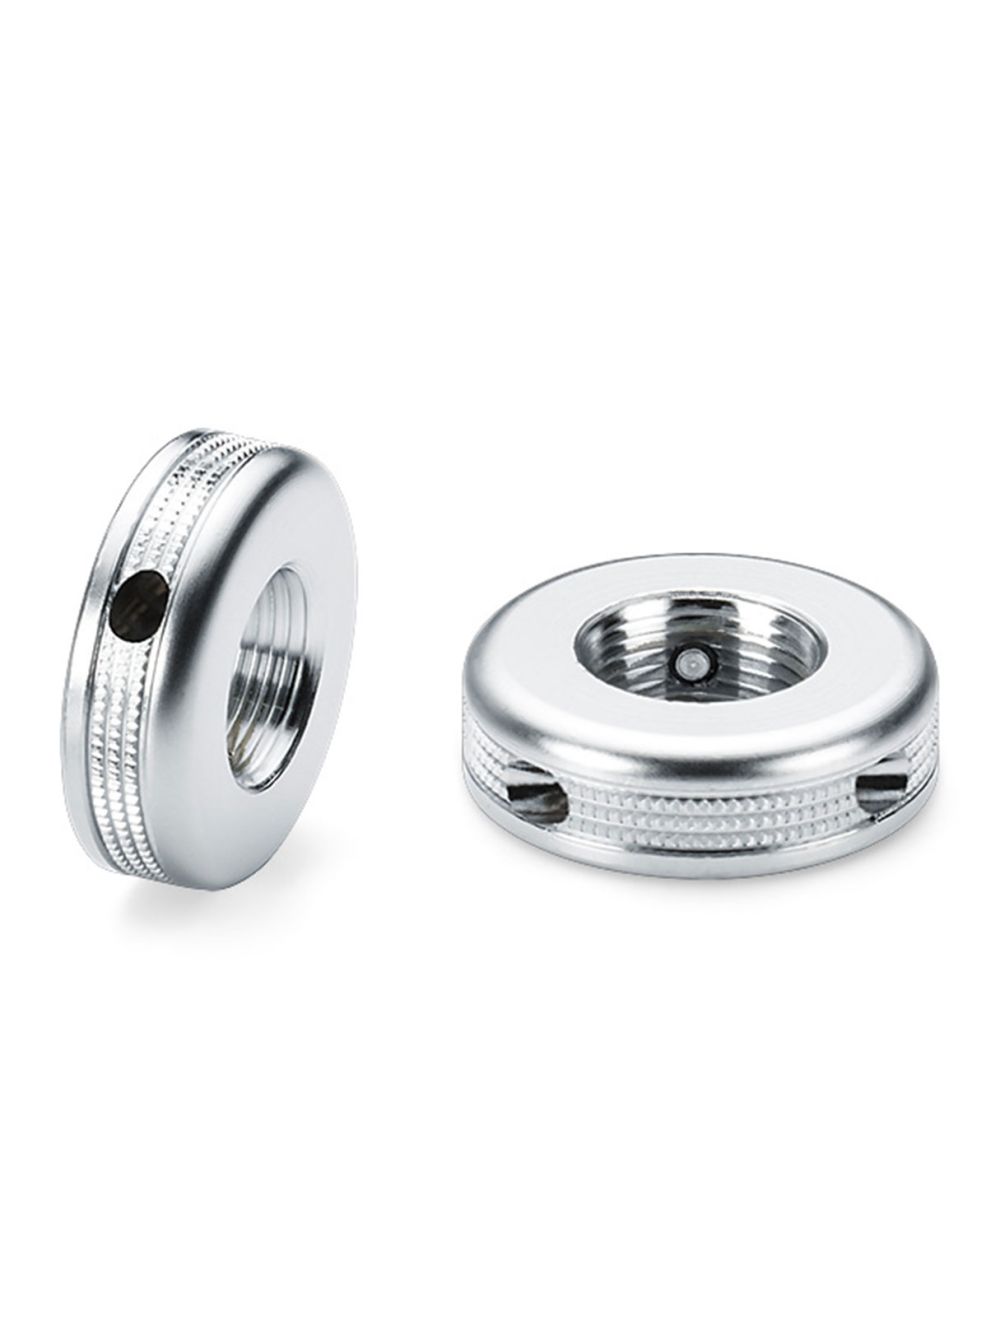
The New Lock-Wheel: Featuring 3-Stage Safety Concept
Final
Compatibility Schaller Security Locks And S-Locks
a.) s-locks are compatible with all existing schaller security locks like this:
Please always use our new S-Lock lock with Lock-Wheel on your strap, then you will always be compatible with all strap buttons and at the same time you will always use all the advantages of our new Lock-Wheel.
Please always make sure that the lock is engaged in the strap button, the lock is attached to the belt in such a way that the strap button is secured in the U-shape of the lock and that the instrument does not rotate.
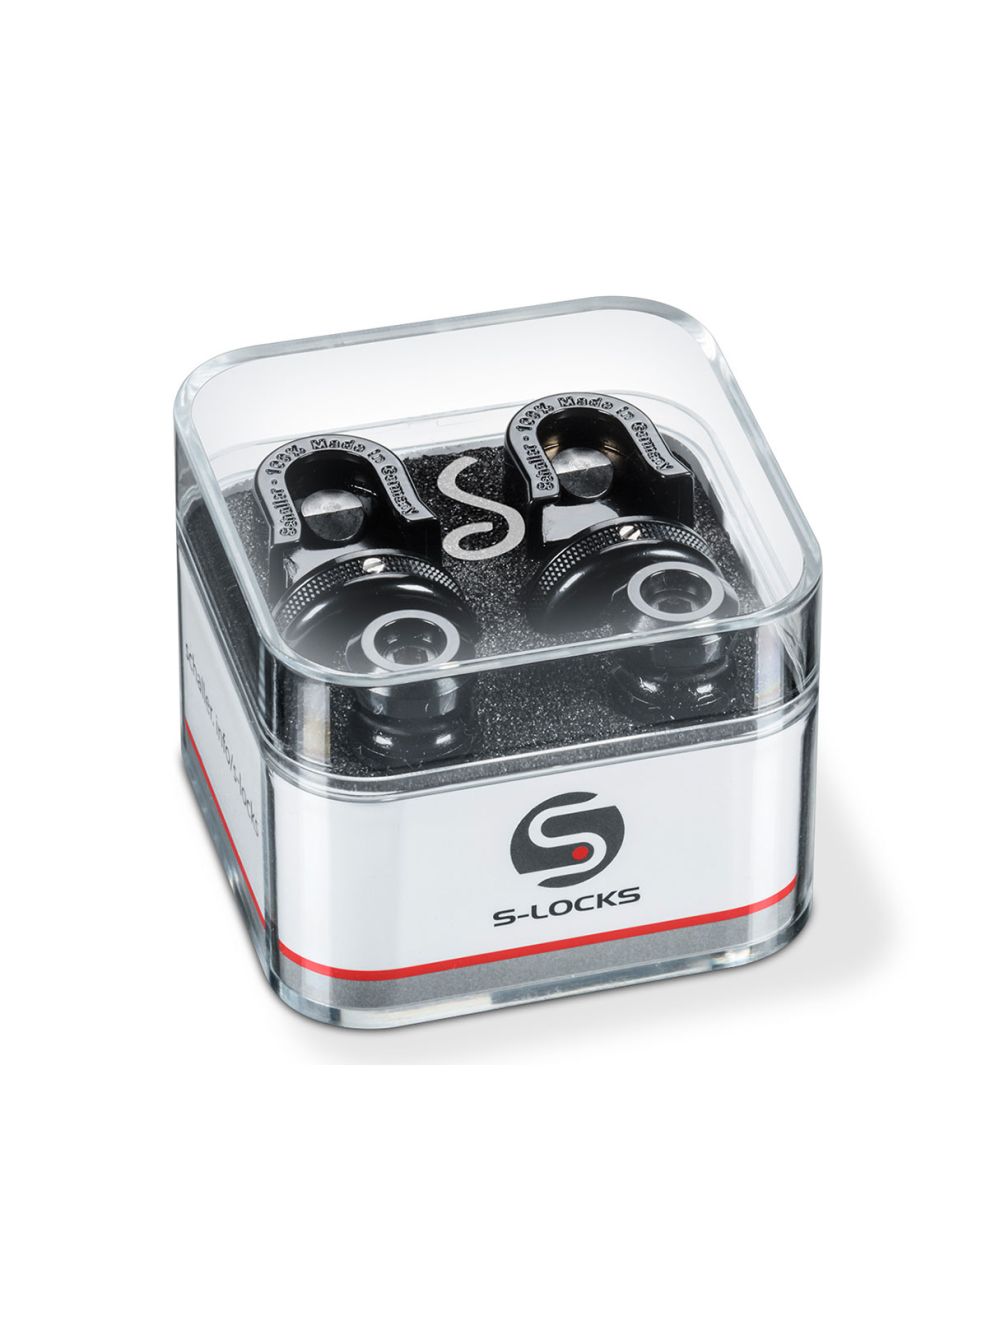
schaller s-locks: only original in the pictured crystal box
It can also be used as a sustainable storage container after removal of the protective foam.
Assembly Instruction Schaller S-Locks
assembly of the strap buttons
Screw the strap buttons with attached felt washer into the existing drill holes by hand using a 3 mm (1/8) Allen key. Please ensure that the strap buttons are fully seated on the wood, if necessary, first rub the wood flat first. If there is no drill hole yet, drill it depending on the wood used.
S-lock dimensions in sizes:
L = male thread 4.5 mm, inside 3.2 mm length 27 mm
M = male thread 4.0 mm, inside 3.0 mm; length 22 mm (standard)
S = male thread 3.5 mm, inside 2.4 mm; length 18 mm
Please check the secure fit of the strap button in the wood regularly and retighten the screw if necessary or reduce or close an enlarged hole as described and re-drill.
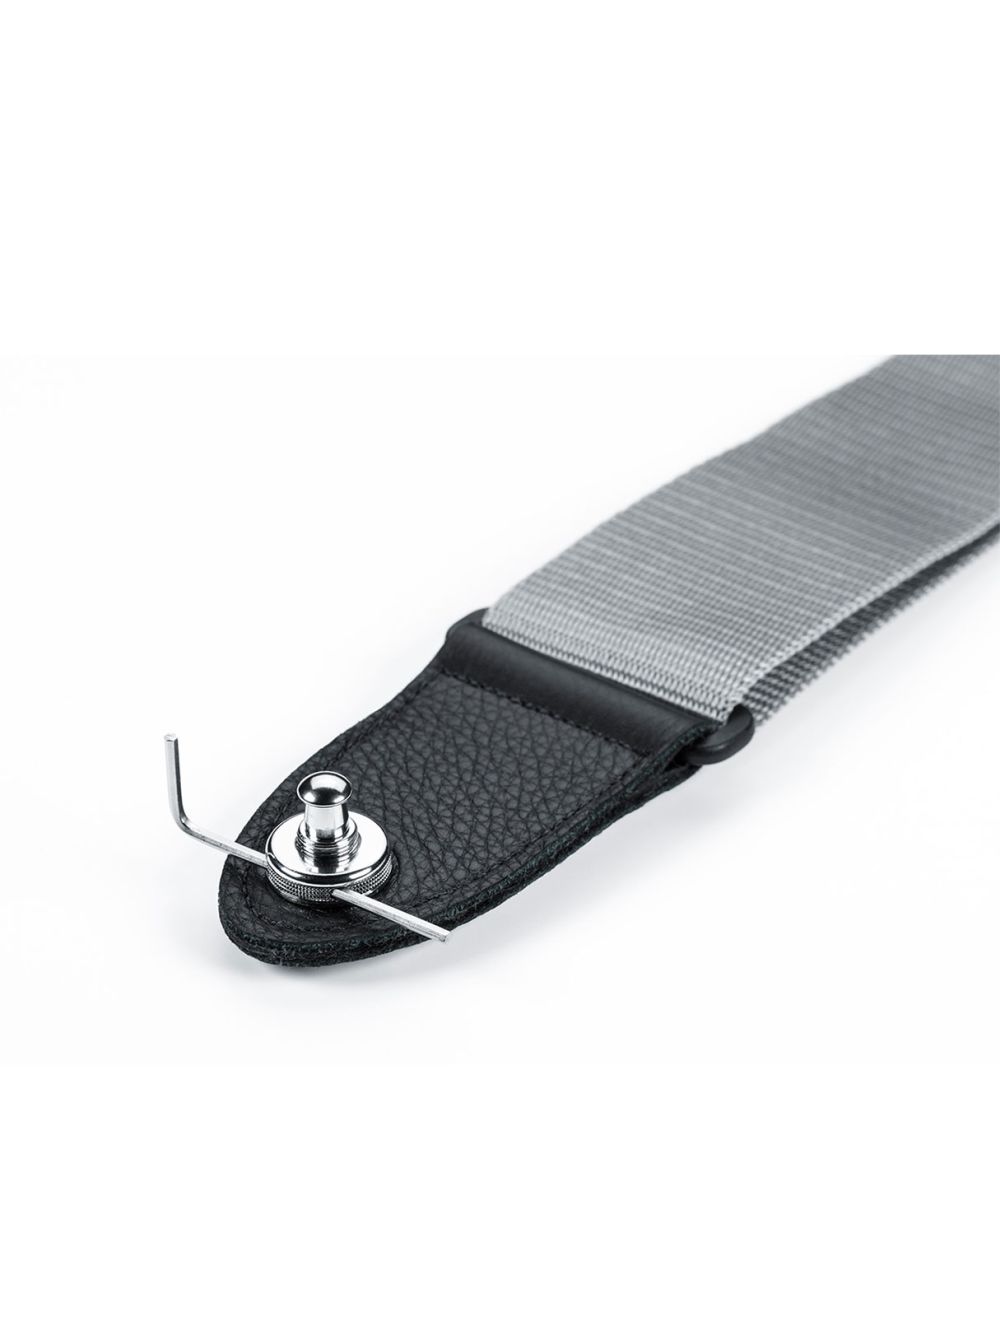
assembly of the locks on the belt
Insert the lock through the hole in the strap. The lock is on the inside of your belt and the threaded hole for the lock-wheel on the outside. The open side of the lock (U-shape) points in each direction to the belt, so that the instrument can later safely hang in the lock.
If the hole in the belt is too narrow or there is only one slot in the belt, please cut away a piece of the belt in a circle (10 mm) that the thread can be easily pushed through the lock without the leather parts standing upright. Otherwise, the lock wheel can not be securely fastened and the lock and lock wheel can disengage.
Recommendation:
If necessary, punch a hole of 10 mm in the leather strap with a round hole punch tool, then our S-Lock lock fits exactly through the leather strap and our lock wheel can be optimally screwed on and locked.
Installation of the Lock-Wheels (3-stage safety concept)
Turn the lock-wheel clockwise onto the thread of the lock. The flat side must point to the belt; the rounded side up! Make sure that the small set screw in the lock-wheel is not screwed inwards and destroys the thread.
Use a 2 mm (5/64’’) Allen key or small screwdriver through the 2-hole mount for an even tighter fit of the lock-wheel for maximum grip.
Screw in the slotted set screw with cone dome (2.5 x 5 mm) with a screwdriver until it stops. This will block the thread and the lock wheel can no longer loosen.
Tip:
Before retightening, always loosen the small grub in the lock-wheel first, otherwise the thread will be damaged.
By retightening the Lock-Wheel, the three small pins on the lock press into the surface of the strap and prevent the lock from accidentally twisting on the strap.
to avoid this, please make sure that
you have a circular hole in the belt and, if necessary, punch out what exactly corresponds to the diameter of the threaded neck of the lock;
press the leather strap as tightly as possible in the area of the lock and lock wheels in advance so that you can then tighten the lock wheel more easily and firmly on the lock;
from time to time you tighten the lock wheel again and again until the leather strap is maximally compressed at this point. Always loosen the micro screw beforehand so as not to destroy the thread.
Check the secure seating of the set screw regularly and retighten the set screw if necessary.
To unscrew the lock-wheel, simply loosen the set screw; the thread remains functional, it cuts through the lock-wheel again free.
Before loosening or retightening the lock-wheel, always unscrew the set screw until it no longer points inwards and damages the thread!
Function of the S-Locks
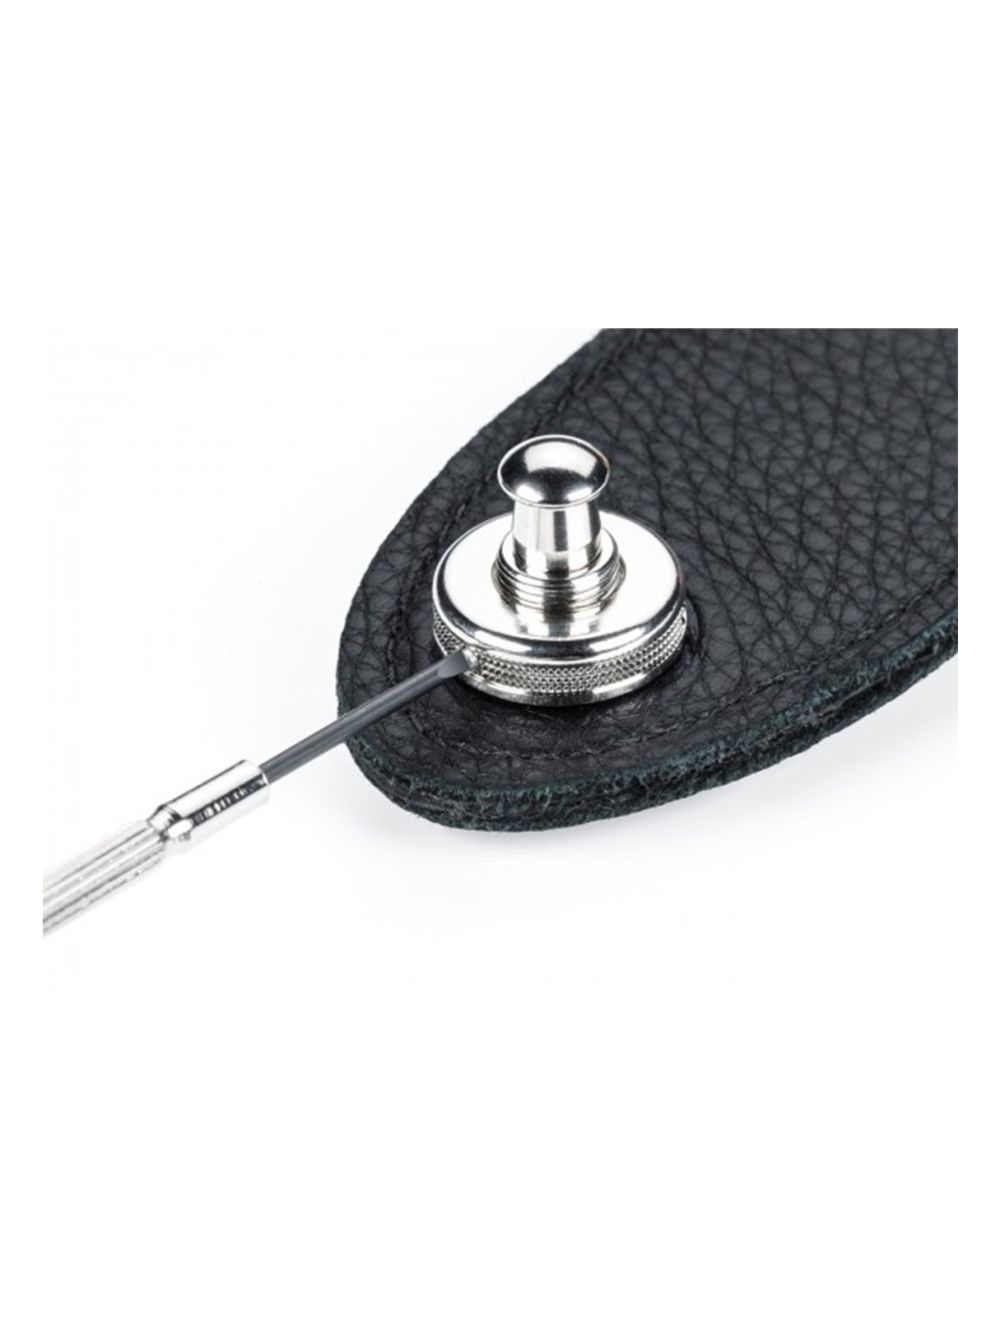
Pull the lock over the strap button without pulling the ball upwards until the lock clicks into place and the bolt lowers into the strap button. The instrument hangs in the U-shaped lock and is thereby held securely.
Check the secure fit. To do this, try to pull the lock without pulling the ball from the strap button. The lock must remain engaged and must not be pulled down by the strap button. The ball must sit on top of the thread.
To release the lock, pull the ball and pull the lock sideways away from the open side of the lock.
There must be a thin gap between the thread of the lock and the pull-up ball. This is sign that the locking bolt is touching the bottom of the strap button and will engage securely before the pull-up ball touches the threaded shaft of the lock. This gives you the assurance that the locking bolt is in the strap button to the maximum.
For reasons of simplification, we only show the picture in nickel for the replacement kits. Please select the desired color using the configurator. You will then receive the desired product in this selected color, even if the product is only shown as nickel in the picture.
S-Locks: S For Safe, Silent & Schaller Strap Locks
The S-Locks New Strap Button
The S-Locks Improved New Lock
The New Lock-Wheel: Featuring 3-Stage Safety Concept
Final
| SKU | SHL-14010401 |
|---|---|
| Brand | Schaller |
| Weight | 0.900000 |
| Refund period | 35 days |
|---|


Login and Registration Form